 Updated 2/26/24
One important step in completing your Katahdin Cedar Log Home is the interior and exterior finishing. Because most of the surfaces inside and out of your home are bare wood surfaces, it’s essential to treat these surfaces to protect the wood and provide a lasting finish. We spoke with Ricki Shields, a log home finish contractor whose 20-plus years of experience make him an expert on the art of log home surfaces.
Protection & Cleaning Ease
There are several benefits to sanding and sealing your cedar surfaces. Sealing the logs and cedar planks provide added protection against UV exposure, which can cause graying and uneven coloring. Interior surfaces that are left unfinished can also be more difficult to clean as their microscopically uneven surfaces can collect dust and allergens. Finally, the sealant enhances the natural resistance to mold and mildew, keeping your cedar beautiful for many years to come.
 Preparation is Key
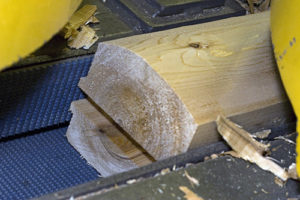
When your Northern White Cedar logs and tongue & groove paneling arrive on your building site, their surfaces are planed smooth at the mill. And while they look smooth, the planer has buffed the surfaces to what Shields called a “mill glaze.” This mill glaze is actually a slippery finish on the wood that can affect how well the stain or urethane sealer adhere to the wood surface. That’s why it’s so important to sand the surface before applying any stain or sealant. “If the mill glaze isn’t sanded, the stain or sealant product doesn’t absorb into the wood the way it should and may look uneven or patchy” Shields explained.
Sanding Prep
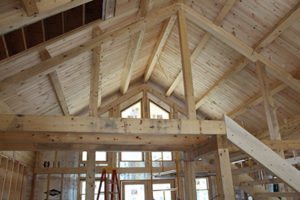
Shields usually works as part of a two-man crew to sand, prep and apply finish coats to the interior and exterior of a log home. This work usually progresses through the house as the plumbing, HVAC and electricity contractors complete their work, but before flooring, cabinets and plumbing fixtures are installed. Often the first interior finishing is on the ceiling tongue & groove once the roof system is completed. Shields prefers to sand these ceiling boards before installation, but sanding prep after placement is also a common procedure. After the initial sanding is complete, any dust on the surfaces will be cleaned off using a tack cloth. Shields takes extra care with clearing the dust to allow for a clean surface to spray.
 Three Coats for Best Results
The first coat of polyurethane or stain will appear uneven as it soaks into the wood. A second coat will even out any unevenness of coverage and lay a foundation for protection. Shields performs a final fine-grit sanding and wipe down before applying the third and final coat of sealant. “For interior clear product we prefer to use a water-based urethane product,” Shields explained. “Oil-based sealers can tend to yellow over time because of the oil component in the sealant.” Shields uses a power spray paint unit and wears a respirator to protect against dust and fumes.
All told, the finishing process of sanding, staining, and sealing will take about two to three weeks for Shields’ team to work their way through the average home. Once the walls and ceiling surfaces are protected and dry, the remaining finish work can be completed.