 Updated 1/4/24
Building day has finally arrived for your beautiful Katahdin Cedar Log Home! The log raising, truss and purlin setting and final enclosure of your log home offers a tangible progress mark for the construction of your log home. We spoke with our most experienced dealer builders to share their collective successful approach to this phase.
Successful Start
the first step to the log wall raising is to have the foundation capped with the first level floor system installed before the log bundles arrive. This provides a safe and secure platform to build upon. When the log bundles are delivered, the crew uses a telescoping forklift or Lull machine to stack them on this completed subfloor leaving the bundle’s plywood base as a cushion for the subfloor. Within a few hours of delivery, you’re ready to begin construction. Loading the bundles right on the capped foundation save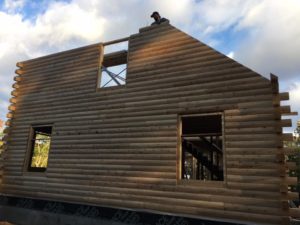 s time and makes the beginning log wall assembly go quickly.
Make It Easy from the Start
The organized way that Katahdin packages their log bundles is unique in the industry. There’s no sorting—bundle one is bundle one—the first one you’ll need to start construction. In the past, without pre-sorted log bundles, a good day and a half of construction time is lost unloading and sorting logs. Katahdin’s presorted bundles are a huge time and money saver
Setting Row One
The first row of logs, or Row 1 in the plans, sets the base for the entire structure. It’s essential that Row 1 be laid out straight and squared, using the Katahdin construction manual instructions as a guide. A properly squared Row 1 will ensure the entire structure will come together as designed. At this point, it’s important to note this guidance: more caulking is NOT better! The logs are milled to fit tightly together using a ¼-inch bead of caulking, he explains. If more than the recommended amount is used, each successive course of logs will tip in slightly, a lean that becomes apparent and pronounced when several courses are laid.
 Experience Counts but Not Necessary!
Constructing a log home with Katahdin can be completed by a layperson, provided he or she follows the Construction Manual faithfully. It’s important to never assume that because a builder has built a log home in the past that he is an expert. Make sure your Katahdin dealer is on site that first log raising day, so he or she can guide you through the techniques. The pre-cutting and drilling of the logs, pre-cut window and door bucks, and other detailed finishes make Katahdin’s log home kits one of the most satisfying and well-constructed log homes available.
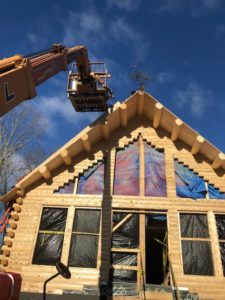
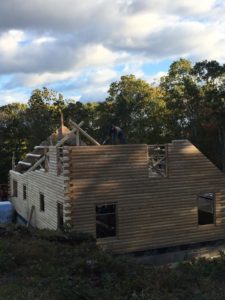
Log Trusses and Roof Systems
When the construction reaches the intersection of the wall and roof system, constructing the distinctive roof trusses requires a lot of guidance. These important structural components are assembled onsite, using either mortise and tenon techniques or metal plates to affix the chords and posts togethe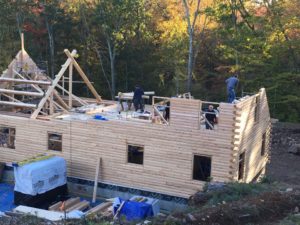 r. Katahdin’s experienced builder helped to develop and test innovations in the Katahdin Roof system construction to ensure an air-tight exterior envelope required for LEED certification in this article. Reconfiguring the log wall penetrations in the roof system has made Katahdin Cedar Log Homes more durable and efficient. It’s notable that this innovation came to the company from the dealer base and was embraced immediately by the management as a significant design change now included in all Katahdin Homes. It’s why Katahdin is considered to be by far the most progressive log home company in the industry.
Enclosing the Log Home
Once the roof system is completed, including a fully vented ridgeline, the next step is completing the enclosure of the log wall envelope. At this time, exterior windows and doors are installed, so that the construction site can now be better secured for the interior finish work. It’s important to note that roughing out the electrical, plumbing and HVAC systems in the new log home is quick work, because of the way these systems are incorporated within the Energy Envelope System. Wiring and vents are installed directly on the interior log walls, before the added interior insulation and wall finishes are applied. Any exterior wall plumbing is installed after the insulation is in place. Katahdin’s design offers the flexibility of finishing with tongue and groove cedar paneling for a whole log interior finish, sheetrock or other common wall material.